
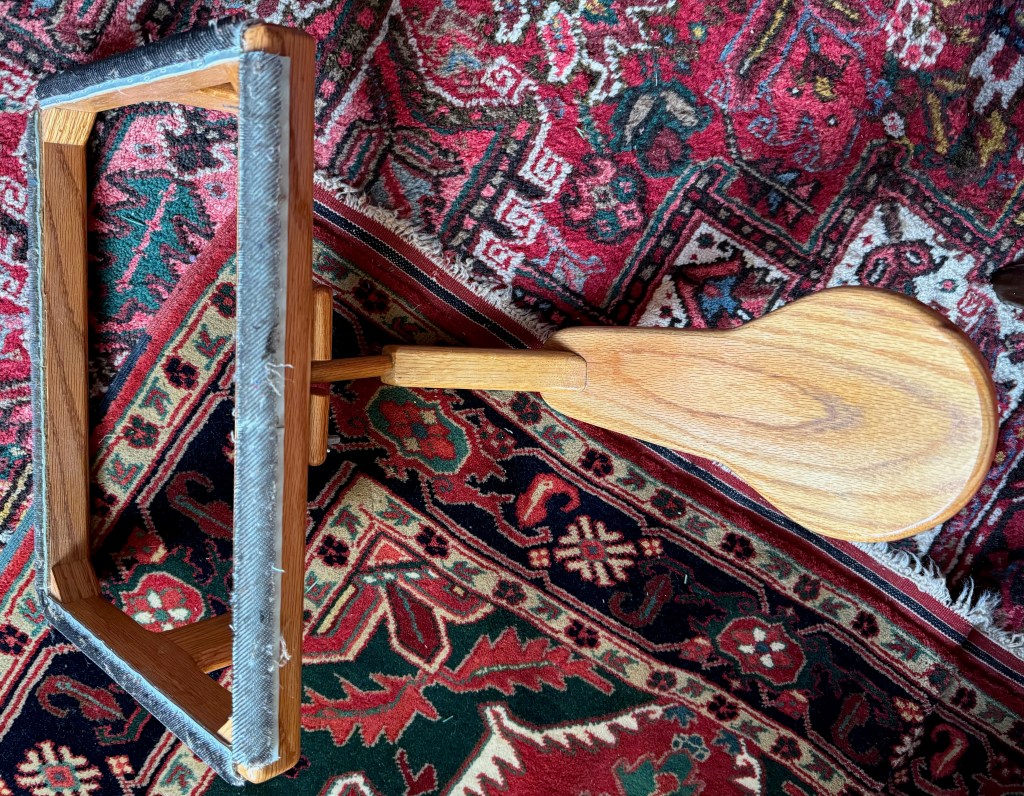
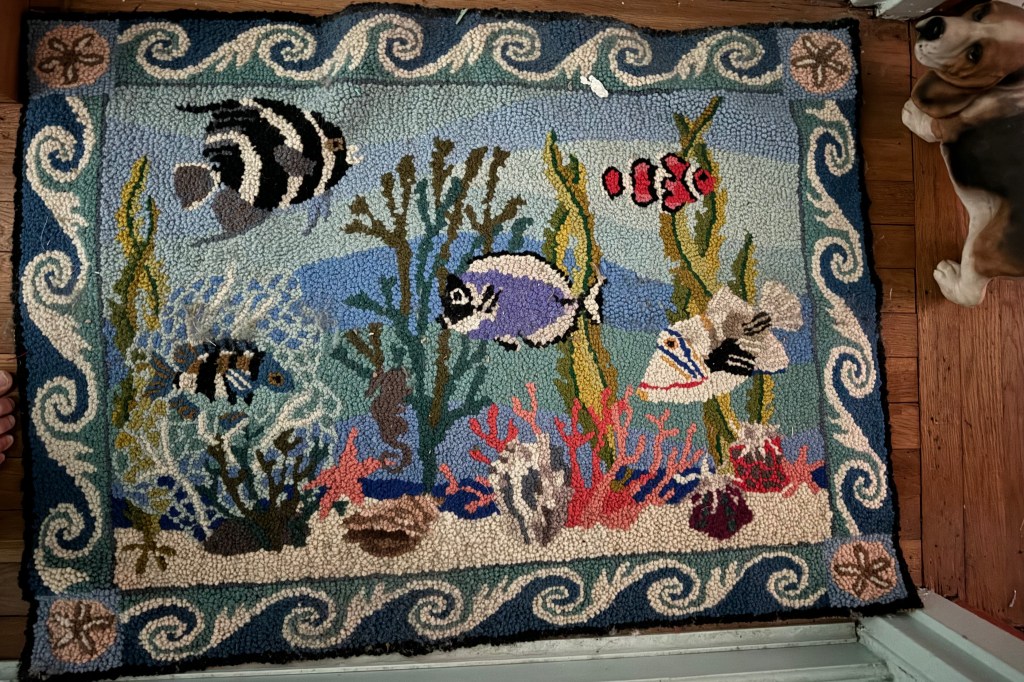
About twenty years ago I came across a hooked rug kit depicting a coral reef. It was pricey, but I loved it, and I thought fondly of those hours when I was very young. So I ordered it. And then I ordered a “sit upon” hooking frame, because you really can’t hook without having the backing suspended on something. Think of it as a big embroidery hoop.
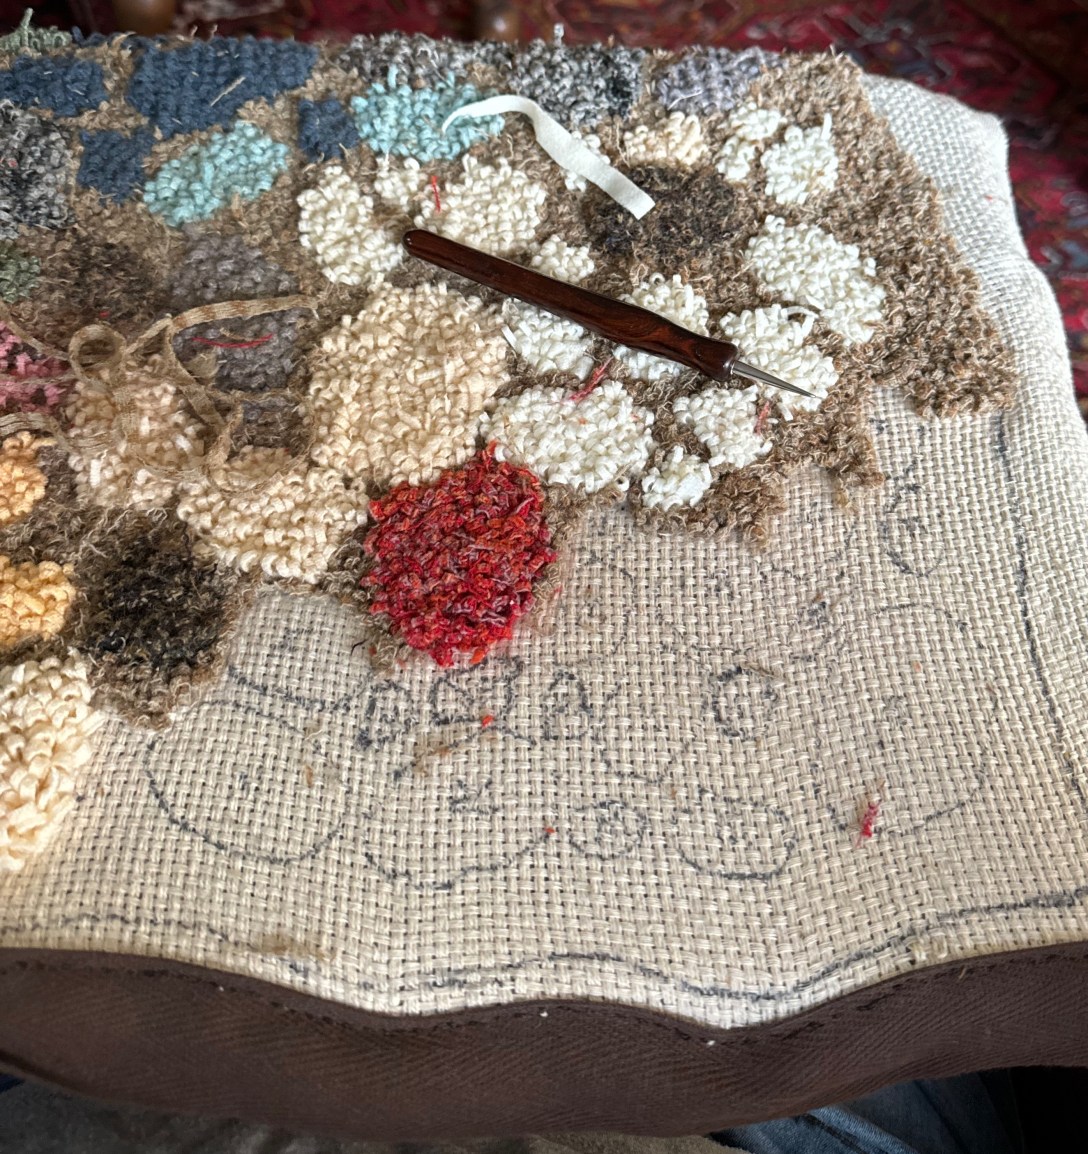
I embarked on my new project with enthusiasm. The colors were so pretty! The pattern was clear and easy to follow. I was surprised that the included wool was actually worsted–yarn, not the cut strips of wool fabric that my mom used. But it was easy enough to work with.
Months passed. I’d work on it when I had time. As I got toward the end I was running low on one particular color. I looked on the website I’d purchased it from to see if I could get more of that color, but they no longer offered that pattern and didn’t offer wool. Color matching might not be quite as critical as with, say, knitting, but it did matter. So my enthusiasm waned. I didn’t want to run out of that blue, and fearing I would made me less willing to work on it.
Until the day in 2018 when I envisioned a new runner for my hallway.
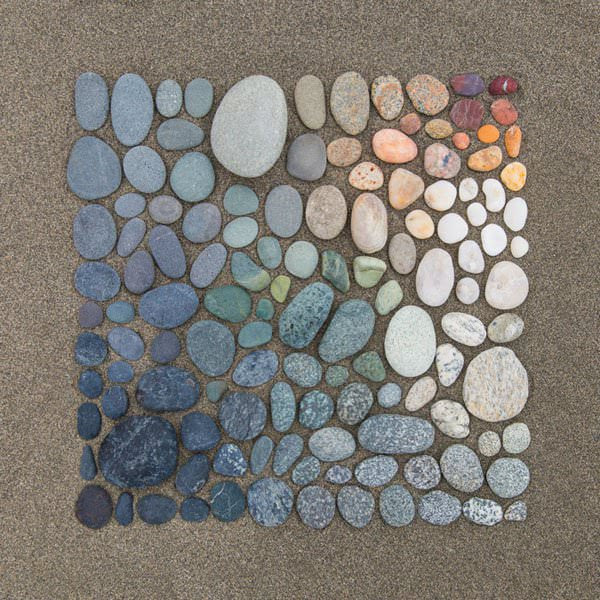
This picture of colored rocks arranged on sand came across my social media feed and I loved it. It speaks to me of treasured hours on beaches all over the world. I can smell the sea and hear the surf when I look at it.
I do not know who the artist is, as the image has been reproduced all over the place (one of my pet peeves about copyright infringement and social media, but I digress).
If I was going to undertake designing and making my own hallway runner, I had to finish the coral reef. So I simultaneously researched how to design and make a hooked rug, and got back to work on the reef rug.
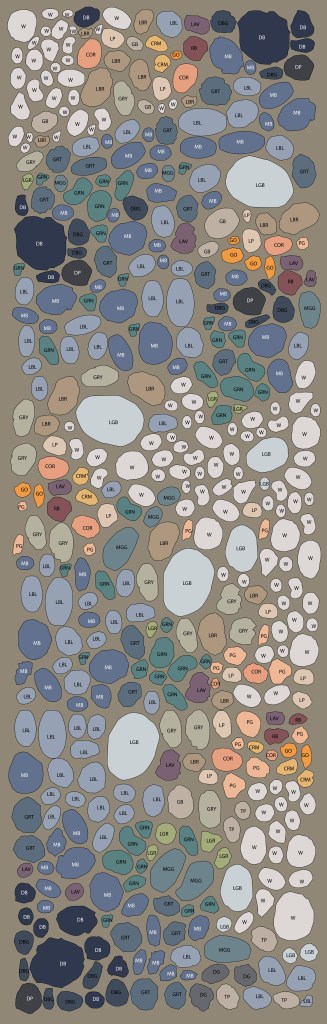
The hardest part of the new project was creating the pattern. The original image is a square. I wanted a rectangle. Fortunately, I had access to Adobe Photoshop and Adobe Illustrator. I imported the image into Illustrator and painstakingly drew the outline of each rock. Then I colored them similarly to the photo. The flat colored ovals didn’t look like the beautiful textured rocks, and that was off-putting. But my research on hooking was teaching me that I could use patterned wool to get a similar effect.
I duplicated the rocks, rearranged them, rotated some, flipped others, resized some, but tried to maintain the color unity–the ombre effect that the original artist had achieved. It was difficult. I didn’t succeed. But in the end I was happy with my result. I gave each color a name and a two- or three-letter abbreviation of that name, and put the abbreviations on the drawing.
Next I printed it out actual size on many sheets of letter size paper. I taped them together so that I had a full size pattern. Meanwhile I’d ordered the backing fabric and special transfer fabric that has a lot of tiny holes in it. I laid the transfer fabric over my pattern and traced every single rock onto it. Then I laid the transfer fabric over the backing fabric and used several Sharpies to trace the rocks again. The black sharpie ink penetrated the pattern fabric through the many holes. Finally, with the original image beside me, I drew over the “dotted” images on the backing fabric and wrote in the color codes.
The pattern was ready. Now for the wool.
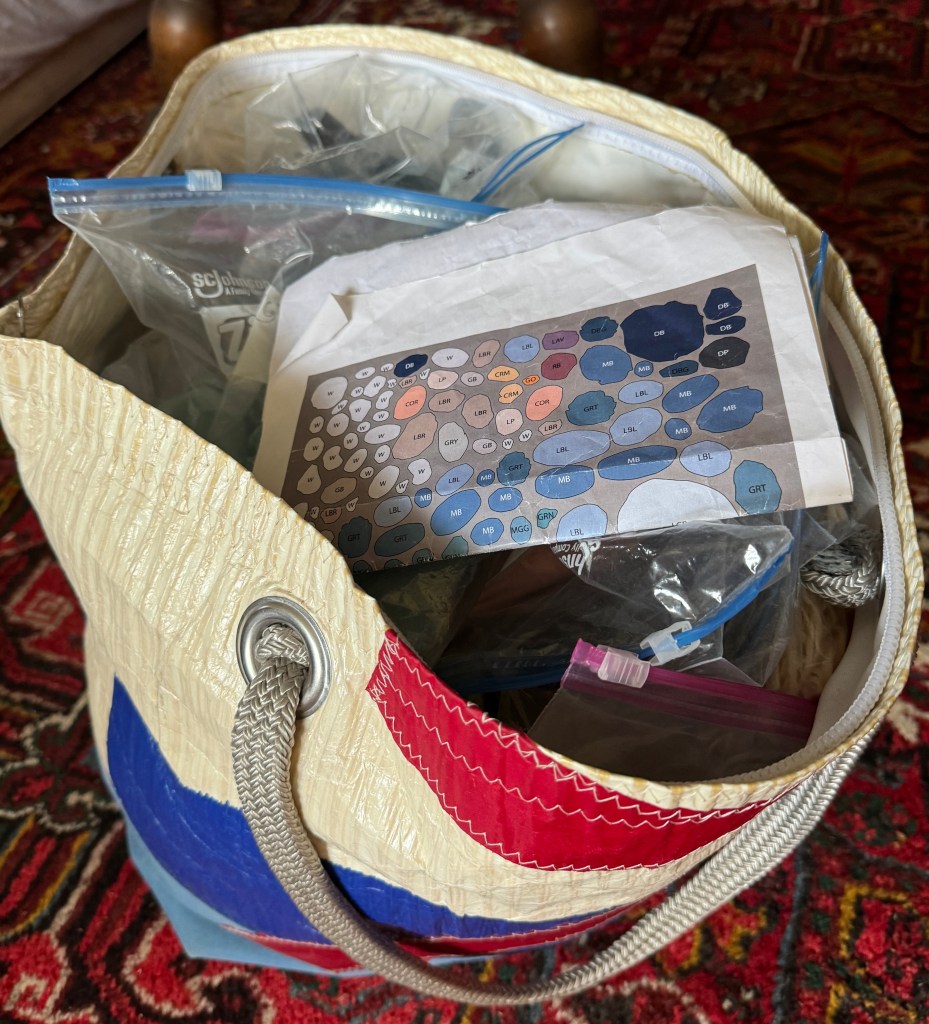
I scoured on-line wool shops. There are more of them than you might expect. I tried to limit myself to buying from just a couple, but I was determined to find the closest color matches I could. That proved to be quite difficult.
I had gleefully identified 23 different colors, never giving a though to whether I could find fabrics with such subtle shade differences. As any artist knows, colors in photographs on the internet are never true to the real object. Also, how much do I buy of each color? Turns out there’s a formula for that, taking into account the width of the wool strips and the area of each color. Area of each color?
The list of color names and abbreviations went into a spreadsheet. Looking at the pattern, I created size classes for each color–small, medium, large–and measured a bunch of the rocks of each color in each class to come up with an average area for each. That went in a column on the spreadsheet–with additional rows for each size of each color. For example, Lighter Blue Large rocks are 11 square inches. Large white rocks are 7.8. In the end I had 44 different color/size combinations. New column on the spreadsheet: how many of each size for each color. Multiply to get the total area for each size of each color. Add those for each color to get the total yardage I needed.
The minimum yardage available for sale is generally one quarter yard, and many of my colors required less than that. But a few, like the sand that forms the background, needed a lot more. As found wool that looked, on line, like it would work for a color, I added the name of the wool and the source to my spreadsheet. I also tracked the cost, the date I ordered it, and the date I received it. So I can say with confidence that the wool cost $534.55. By now it was 2020. I did my bit for the pandemic economy.
Time to get started. I’d get up early, a holdover from my commuting days, and work on the rug for an hour or so each morning before heading into the home office to work. In the summer it was too hot to sit under all that wool, so progress was slower. But I kept hooking, occasionally repositioning the rug on the frame as an area was completed. It was a lot more rug than the coral reef! Sometimes it seemed like it would never end.
After all that calculation, I decided to make my rug textured–make the loops forming the stones higher than the surrounding sand. This would take more wool, but for most colors I had extra because of the quarter yard minimum.

Even so, I ran out of one of the blues and was relieved to find the same color still available from the same source. The “light pink” I ordered didn’t look at all like light pink. I used it for some of the stones, but in the summer of 2023 when I found a better light pink in an actual wool store, I bought it and finished using a mix of the original and the new–creating a pink granite sort of look. I was worried about the sand, as I approached the end what had seemed like a massive piece of wool was down to a few square inches. But it lasted. Barely.
From the middle of summer, 2020, until the summer of 2023 I pushed along, sometimes letting it sit for months at a stretch. But, just like with the rocks back in 2018, I had a moment of inspiration looking at a photograph I took on Molokai’i. I wanted that row of palm trees to be my next rug. So I repeated the pattern creation–easier from a single photo–area calculation, and wool shopping. I don’t have Photoshop and Illustrator anymore, but I do have the Affinity suite of design software, and Afinity Designer has a very handy area calculator. I shopped for and ordered the wool.
On Thanksgiving day, 2023, I was down to the last square foot of the hallway runner.
I vowed to be done. I sat watching the Macy’s Thanksgiving Day Parade, and the AKC Dog Show, and hooking.

The dogshow was over when I finally took it off the frame and laid it out on the floor. I absolutely love it. It doesn’t perfectly replicate the original photo. It is my own design and it’s gorgeous.
