They’re all over Etsy and social media: those clever miniature scenes in a box that you tuck in between the books on your shelves. I couldn’t resist designing a few of my own.
Most designs are either whimsical–Alice and the Cheshire cat at tea–or fantastical–a dimly list Diagon Alley. I started with a very cramped, old library.
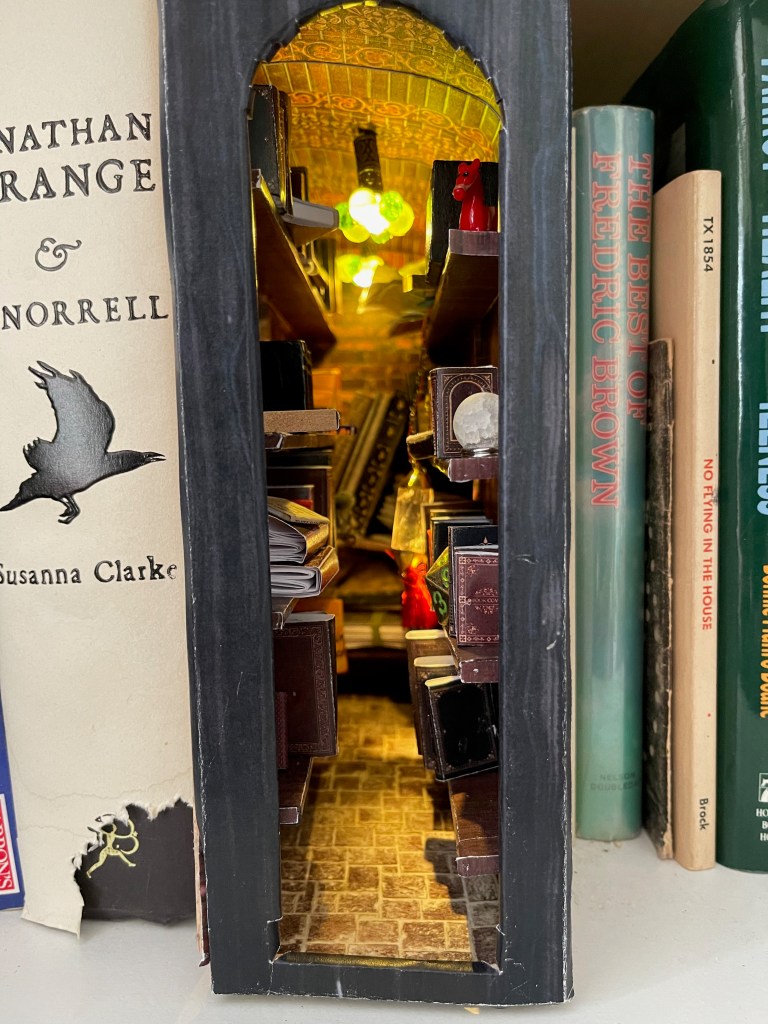
Some of the books are blank, but I made many with miniature text I found on-line. Covers are all paper, also printed from on-line free images. The floor and ceiling are bricks and textures printed on paper, although the ceiling bricks are actually printed on heavy stock and embossed to match the pattern. The shelves are balsa covered with wood-grain printed paper, and the front is also wood-grain printed paper–and it’s not holding up so well. The light fixtures are from Michael’s bead department, illuminated with tiny, battery powered LEDs.

One of the kit miniature kits I made a few years ago was a greenhouse. Because it was just sitting taking up space, I decided to repurpose it as a booknook. Certainly I didn’t want to loose all the effort I’d put into all those tiny flowers and plants! I took apart the greenhouse and discarded most of the transparent plastic “glass.” I repurposed the bamboo pieces from the lid of a clothes hamper that I was getting rid of for the walls of this nook and used some of the support pieces from the original in the new decor. I printed the wallpaper from a free image on-line. And printed a free Mondrian image onto clear plastic for the rear window. All the rest of the decor is the plants and furniture from the greenhouse kit. I was determined to use every single piece.
The original greenhouse had one light, which I re-used in the front. The rear wall with the Mondrian window is actually at an angle with more mini LEDs behind it.
While the light switch for the library is on the inside of the arch in the front, for this box I got more ambitious. The box itself is a kit I bought from a creator on Etsy. I created a false floor with a drawer under it. The wiring runs down behind the rear window and into the drawer with plenty of spare so that the drawer can be pulled out.
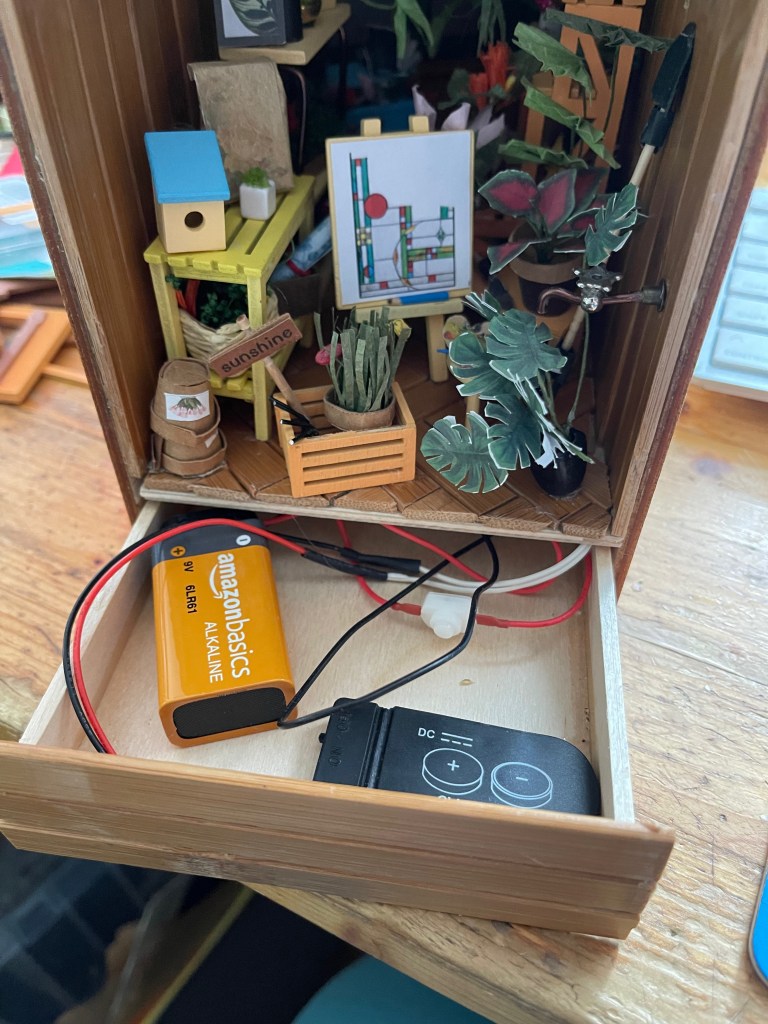
The two lights are separate, the original uses the coin cell battery and the set of several lights behind the window require the 9-volt.
After all this cozy indoor stuff, what I really wanted was to escape to the beach.
The outsides of these first two boxes are unadorned except in front. After all, they sit among books that hide their sides. But for the beach I went with full coverage. I found a photo of the sea that I could crop wide, then printed it. I had to use multiple sheets of paper (sure as heck not going to go pay for an extra long printout) and join them together. Both the inside and the outside of the beach box have the same beach to sea to sky image.
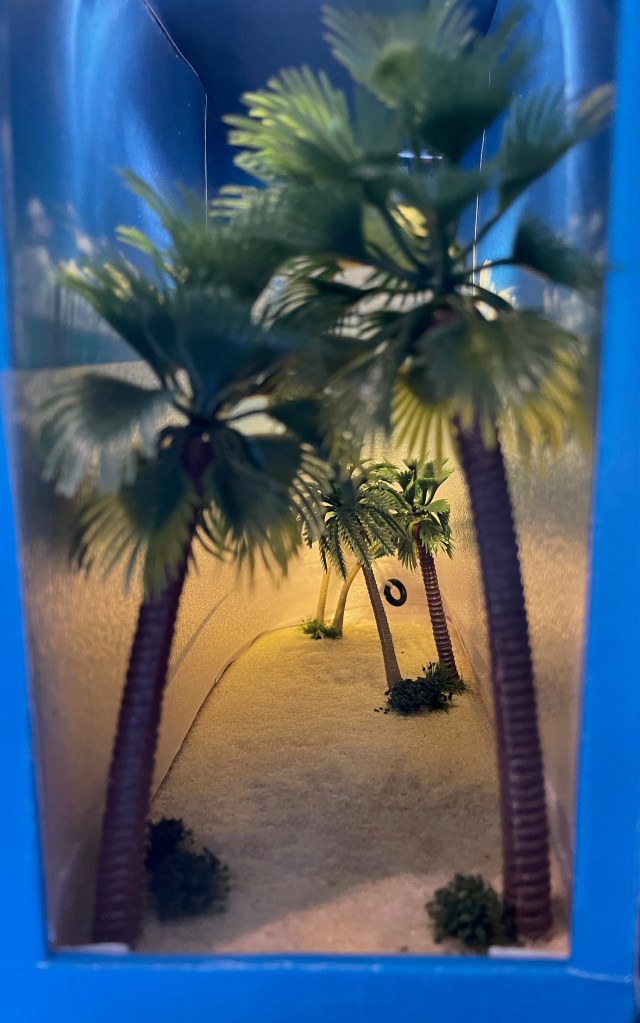
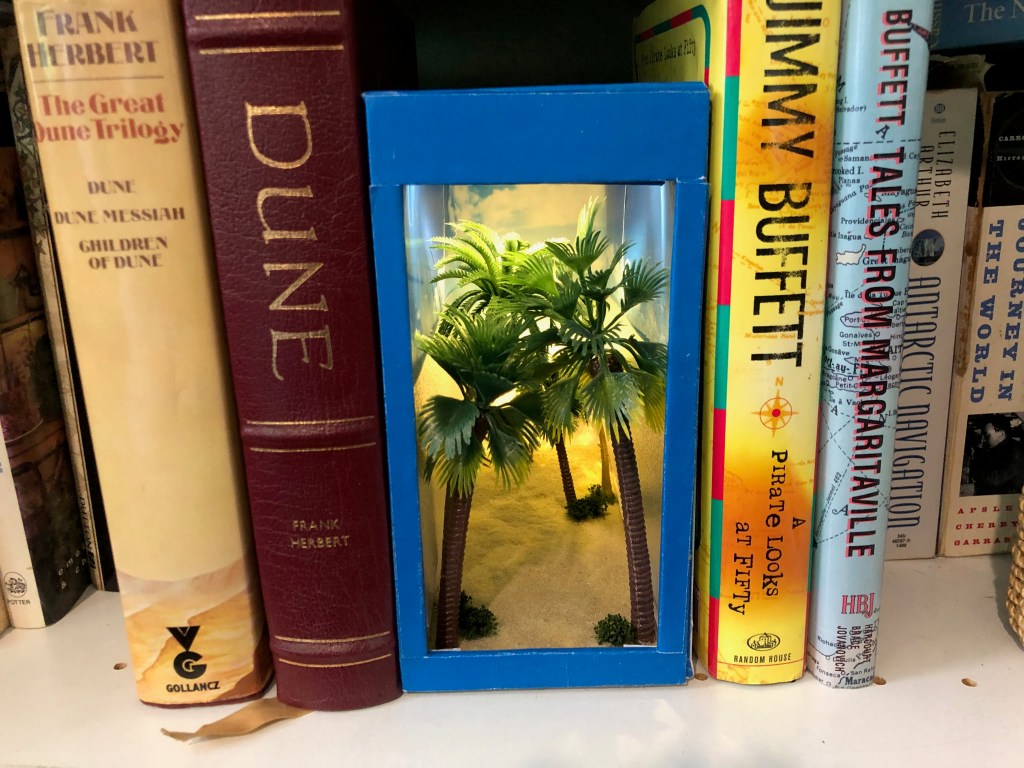
My resistance to spending much money on this failed after the background printing stubbornness, though. I bought miniature palm trees, some green moss, and a little bag of fine sand, sheets of pebbled transparent plastic and assorted black o-rings to bring this project together. Even so, up close the rough edges show. Still, nestled in among appropriate books, my little beach is appealing. I didn’t try to create a sun, just mounted the LEDs in the top front along with their switch.
My final project, so far, was a Christmas present for a family member who is a band director. There was no avoiding spending some money on this one, as I needed relatively realistic looking musical instruments. Scale is a challenge with any miniature project. I’m used to working at “dollhouse scale,” which is one-inch = one foot. But that’s too large for these booknooks. So in searching for instruments I had to carefully check the dimensions.
I relied on perspective on this one, too–placing the small-ish piano at the back: it looks small because it’s far away. Yeah, that’s the ticket. I had a piece of that pebbled plastic leftover, and it made a perfect ceiling to diffuse the light from a battery powered string. I wanted to incorporate my quilling into this one, so I made the pot and plants resting on the piano. The trombone, my relative’s favorite instrument, was made of mustard colored plastic. I painted it and the saxophone and coronet gold. The egg carton acoustic panels were probably the most work. I made a miniature egg carton out of Sculpey. I used that to make reverse molds which I textured by pressing in a little ball of crumpled aluminum foil. Then I pressed in a soft no-bake clay to make each panel. The photos on the right wall are of the actual band for which this room was made.
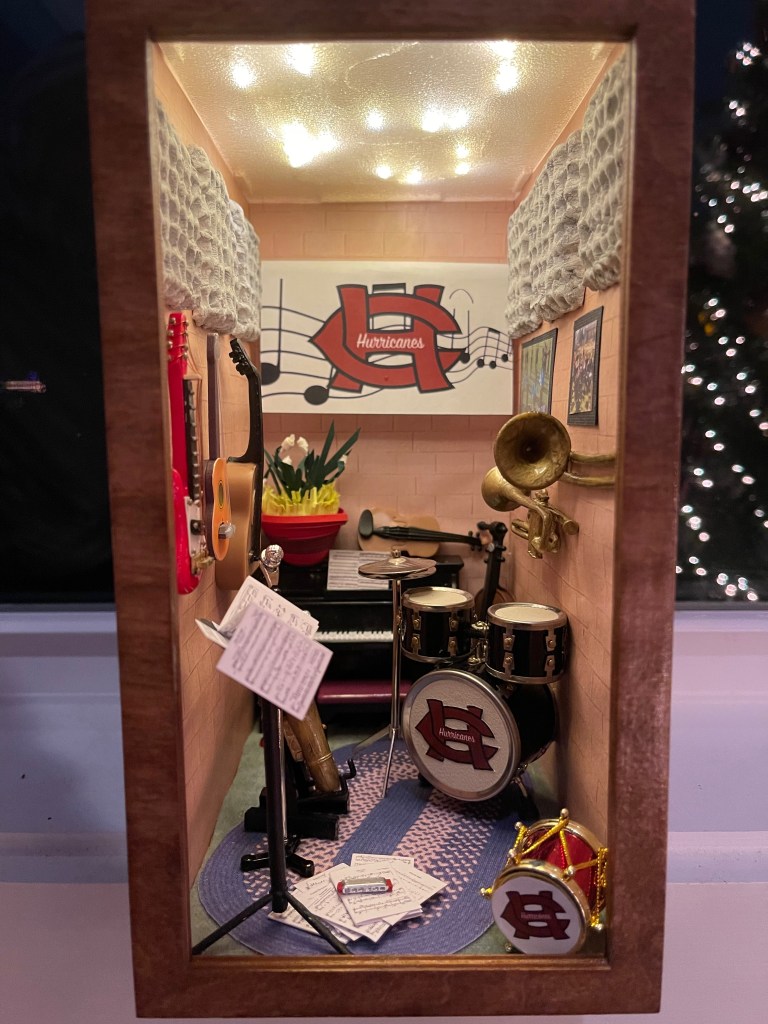
My favorite part of the band room is the harmonica sitting on the stack of music on the floor. Actually, my favorite part was how much my relative liked it on Christmas morning.
A Book Booknook
Here’s a different type of bookshelf project–one that might offend some.
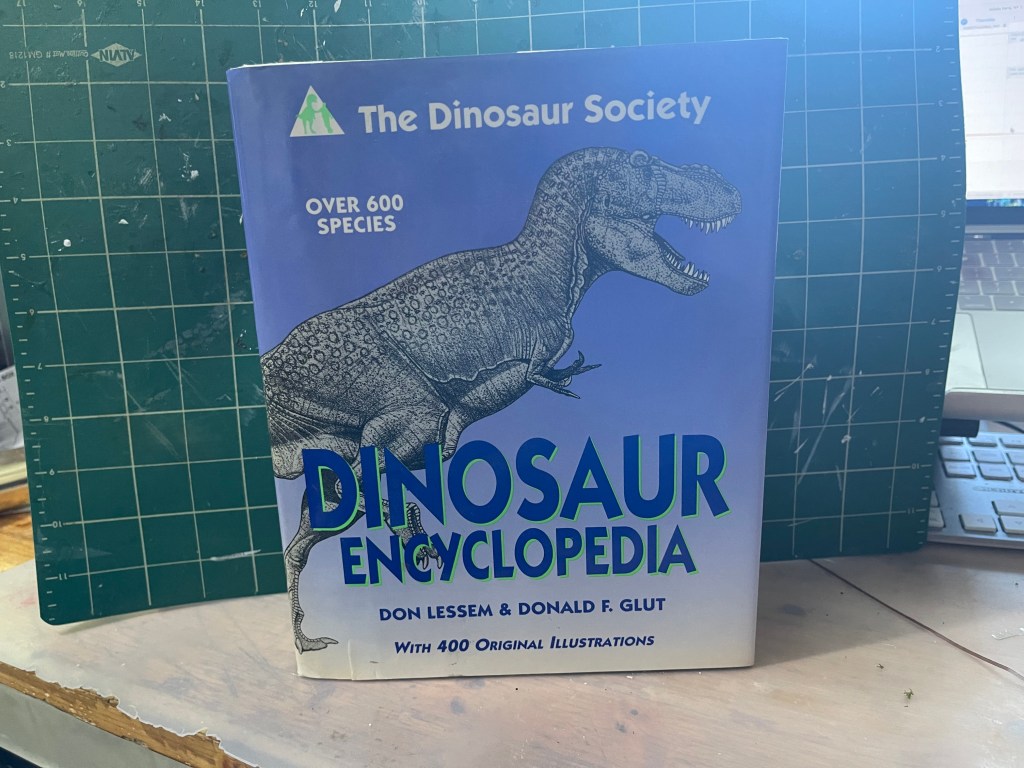
I once worked for Random House Reference. In fact, I was the managing editor. So I have copies of quite a few reference books that do not interest me that much. Dinosaur Encyclopedia is one of them.
So last week I took an X-acto knife to it. I cut out the middles of most of the pages. It’s a thick book, so this took quite a bit of time and the cut edges were a bit ragged, but finally I had an open rectangle in the middle of the book.
My first thought was a prehistoric scene. I stopped in at Michaels and bought some tiny dinosaurs, some model railroad greenery and some plant stickers from the scrapbook section. I also picked up a set of two coin-battery operated lights because, although I have lights at home, these were quick and easy. And I got some Modge Podge.
I modeled a rectangular liner for the opening–1.5 inch high and 1 millimeter thick with a 2 millimeter rim at the top. This fit perfectly into the opening and hid the ragged cut edges. I coated the inside cut edges of the pages with Modge Podge and let it sit overnight. I didn’t want to coat the outsides of the pages, I want them to retain their normal book appearance. After the adhesive dried, the liner still fit well.
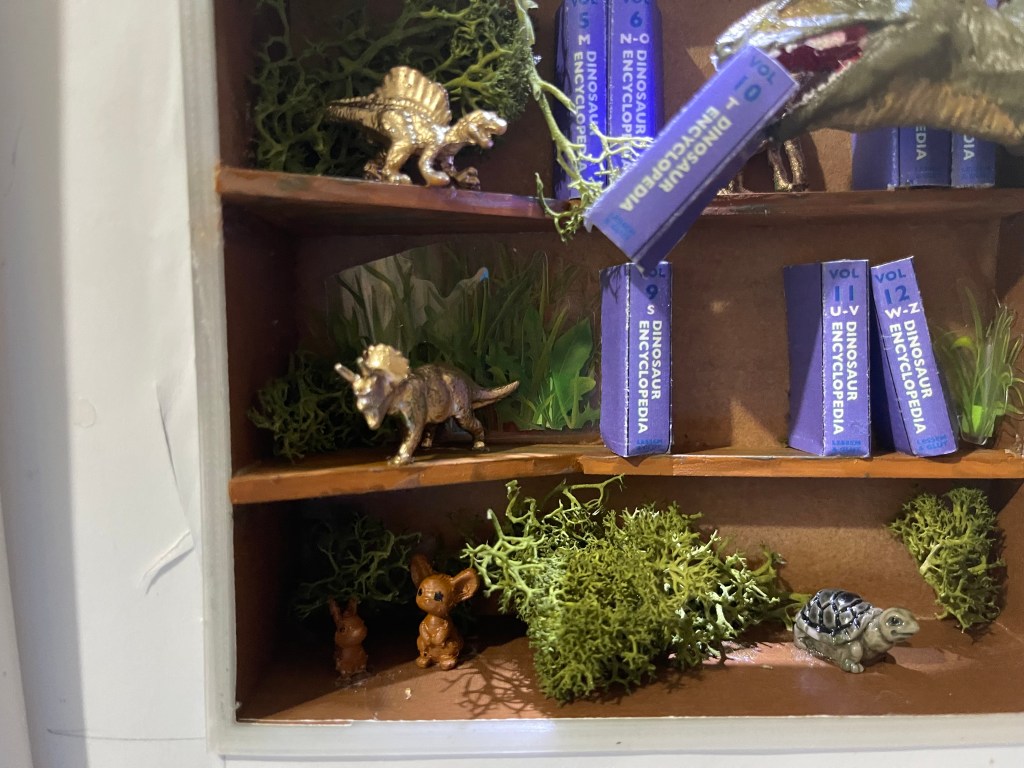
A search of Thingverse for dinosaur models resulted in a t-rex head that was perfect. I also found a couple mouse figures because there were mammals even when dinosaurs rules the earth.
The more I thought about it, the more the dinosaur “encyclopedia” resonated. Dinosaurs need an encyclopedia, right? I mean, they didn’t have the internet and Wikipedia.
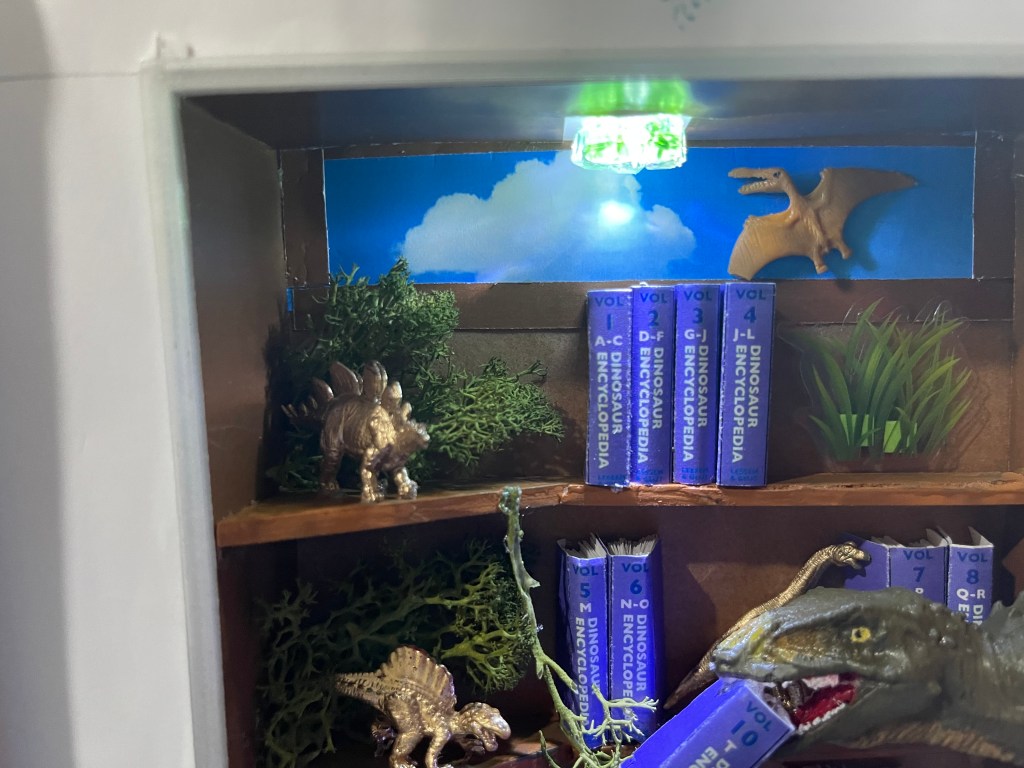
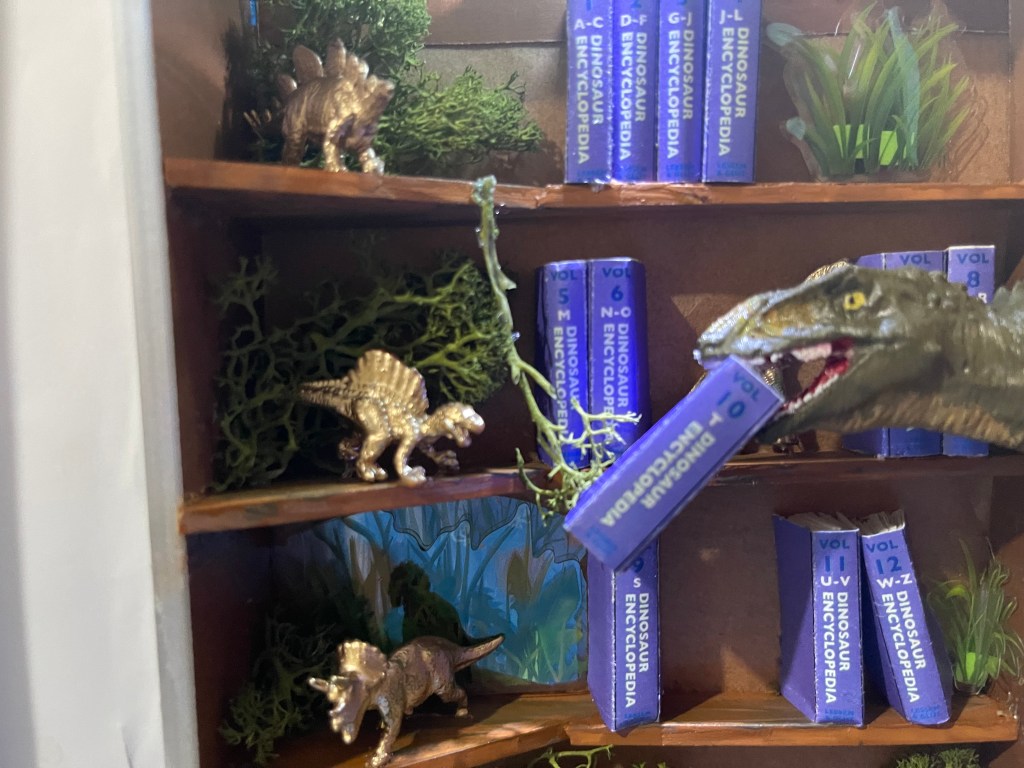
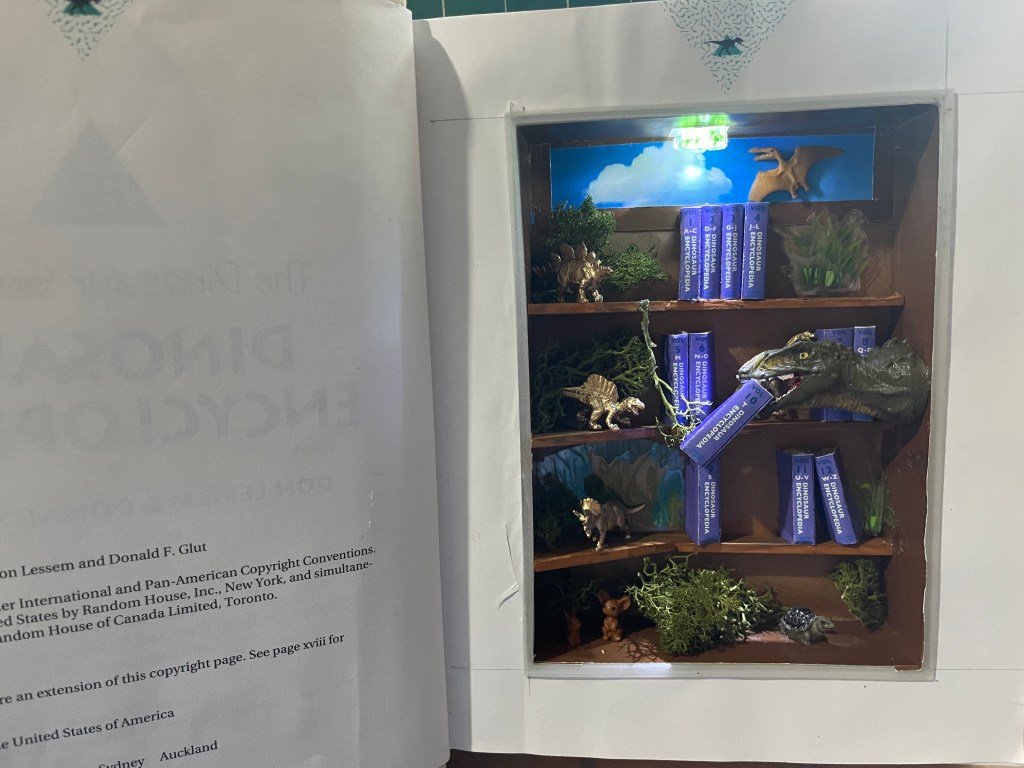
I cut basswood shelves. Using my current computer design software (Affinity Designer) I made up a set of miniature encyclopedia covers similar to the actual book’s cover, but 12 volumes. I made tons of pages (strips of paper folded zig-zag to the necessary bulk for each cover–the volumes are of various widths). I printed t-rex and the mice and painted them with model enamel. Painted the shelves with the same paint because I had it out and why drag out acrylics too?
Some of the little dinos I’d bought became golden statues for the shelves, except the pterodactyl that’s flying by out the window.
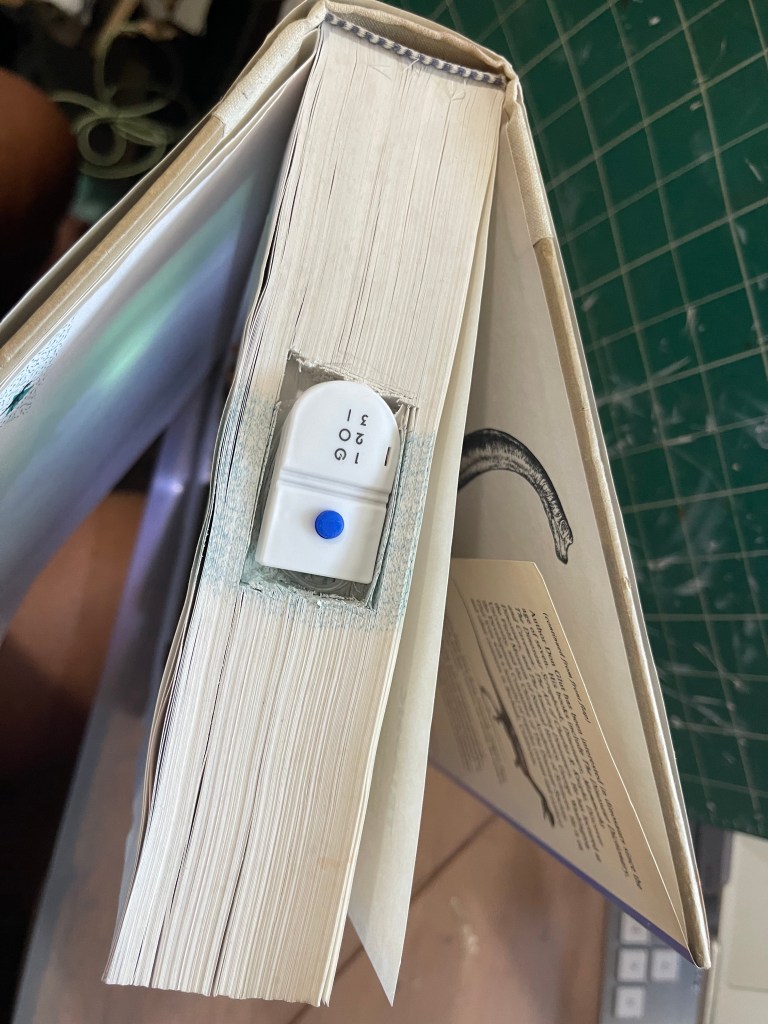
I had to cut a rectangle out of the top of the pages to hold the light battery pack and on/off button, and a channel through the pages into the main section for the light. Oh, and I bought a couple new X-acto handles at Michaels because my dear old one–which I’ve had pretty much my whole life, broke on this project.
Finally, I assembled all the pieces. Because it’s a primordial library, plantlife has invaded the shelves, but that doesn’t deter t-rex from taking his favorite volume (T). The mice are hiding down among the foliage at the bottom along with a confused turtle.